|
|
|
North Florida Bus ConversionC. Fred Hobe
|
| Tip on installing rear cap under
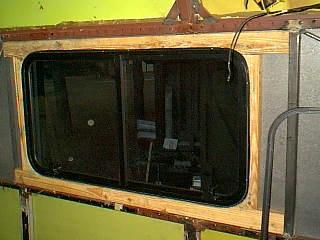
the coach roof. First find the center of your cap and make a mark on the front edge. Now make a mark on the center of the roof. Set cap on roof and line up both marks. This makes sure that the cap will be centered when it goes under the roof. I now cut about 10 two inch strips of sheet metal. Place these strips on both sides of the cap on top and under the cap. This makes sure that it will slide up under with out jamming on the roof or the rib under the cap. Next we will pull the cap into place. I have a piece of ¼ inch flat steel about 3 inches long with a 3/8 hole in the center. I now drill a 3/8 hole in the clearance light flat surface on each corner. And install a bolt with ring on the end to be used to pull cap under roof. I go into the coach and install a come along on the ring and the other end on a rib. Picture is self explaining. And pull each corner under the roof. Make sure that you have cleaned out all rivets and tar that is between the roof and the rib when you pulled out old cap. Spray soap on both sides of cap and pull cap under. Measure from back rib to the back of the cap to make sure that cap is the same on both sides. Check to make sure cap is strait up in the rear . Cut cap to fit at bottom and both sides and rivet it down. I caulk on both sides and put a little dab of caulk on each rivet when installing them and you will have a water tight cap. I use ¼ inch alum.buck rivets or ¼ inch alum.megga grip rivets Both work very good. I use P & L gutter and flashing caulk for sealing all joints. 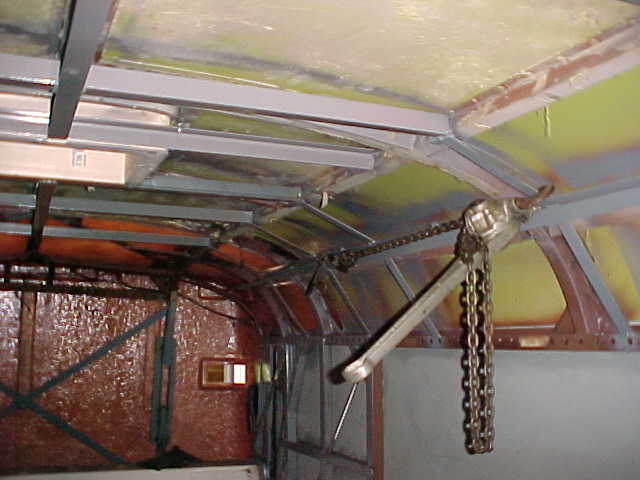 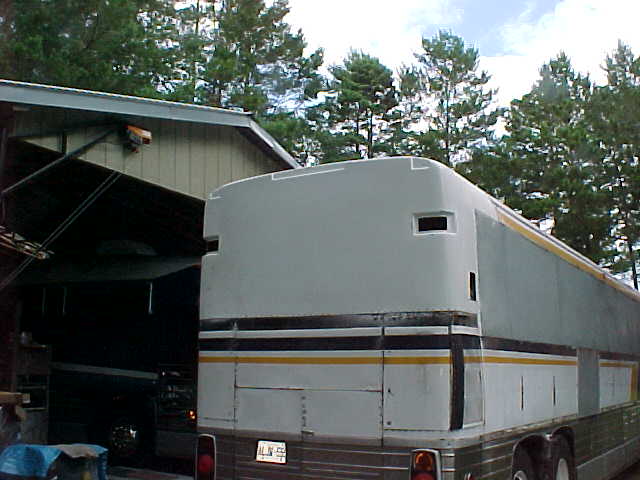 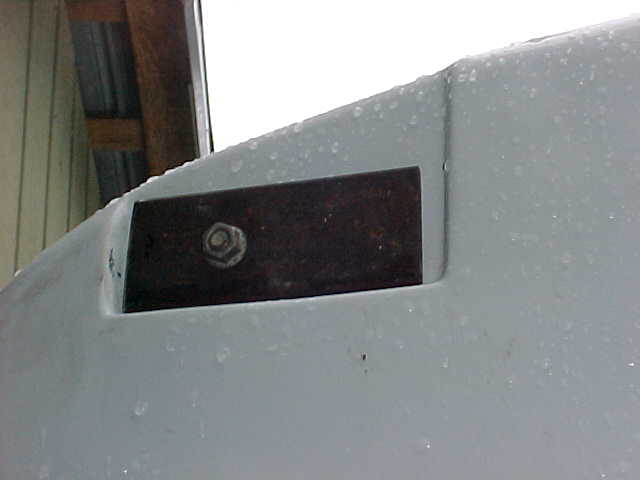 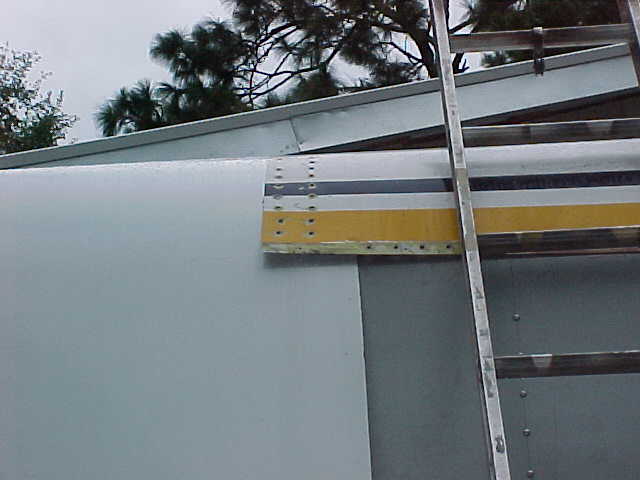 Heres a tip on removing paint down to bare metal. First buy 5 gallons of paint remover. Next paint the entire coach, put striper on thick. Try and do it in the shade to keep it from drying out too fast. Let it sit for a half hour or more. Then I use a 4000 P.P.S.F. pressure washer and blow all the paint off. It will take you about 5 hours to strip it down to bare metal. Very easy and no dust to breath. Some places may take a second coat of remover, but it will be very easy to strip to make ready to sand and paint. I use to use the old put on striper and scrape with a plastic scraper. Lots of hard work. 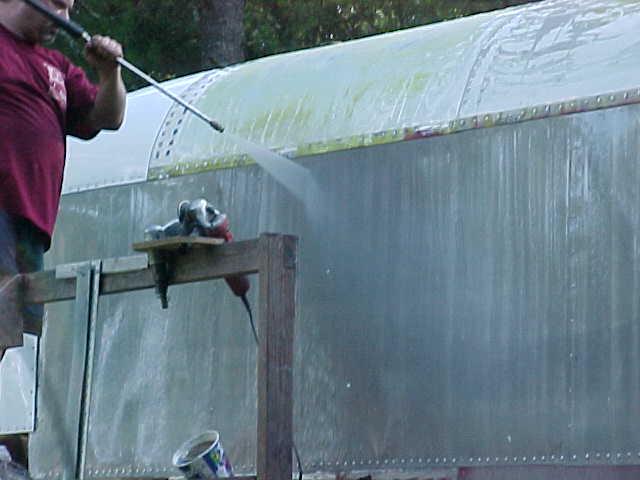 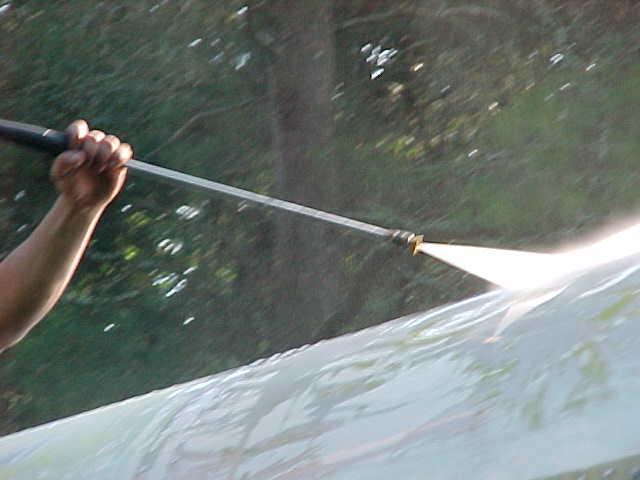 Slide-outs on MCI's - (Not recommended) - Another way to make more room. I have had over the last month about 6 questions on how to install a slide out on MCI's. The answer is that you shouldn’t. If you want a slide out you need to get a Eagle, as they have a frame type construction that you cut and do almost anything to. Here is a tip on how to give yourself more room in a coach. When you build your kitchen cabinets instead of making them 24 inches wide cut it down to 20 inches. You then install a bar sink in it and the 4 inches that you save sure makes a difference when you are trying to pass one another in the kitchen area. Tip on installing R.M. fiber glass fenders on your coach When you get your fenders they will have to be cut around the outer edge. Mark a one inch line from the curve of the fender all the way around. Use a saber saw with a cobalt hack saw blade as fiber glass will dull a saw quicker than steel. Now have someone hold the fender up on the S.S. were it
belongs and mark it with a black felt point pen, fine write type. Now take a 4 inch hand
grinder with a metal cutting blade and cut the raised parts of the S.S. down to were it is
flat along your line. Then cut across the top of the raised part. Now you can hammer it
down, so fender will lay flat to the coach. On the front fenders go back so that you just
cover the hole on the side turn signal light. You can spread the fenders at the bottom
about a ½ inch to make it run straight down if you need to. Put a rivet every 3 inches
around. Now you have a good modern looking coach. BE VERY CAREFUL when you are making
turns going in and out of camp grounds as Fiber glass breaks easy and is hard to replace.
I have destroyed several. Tip on building a air leveling system. There are several combinations to put your system together, depending on were you are going to put them. One place is in the right side engine compartment and the front one in the front bin. There are other places like in a compartment on the inside of the coach. Some use plastic tubing to hook up, but I don’t trust it. Some use small gages and four shut off valves. But the constant changing of pressure will break the diaphragm on the gages. On most coaches that are air ride, the air will go down in a
few hours with the original system. It is the leveling valves that are the big cause of
leaks. When installing this system you take them off. The air bags seldom leak, they are
like your tires. If your air frames are good, a leveling system on your coach will not
leak. Your coach can be easily adjusted from side to side by letting air out of the high
side and adding a little on the low side. With this system your coach will stay the same
all the time and only go down when you have a problem. I adjust mine with my small
compressor that I carry. Because you don’t have to raise the coach every time you
start, it only takes a few minutes to get the air up to 120 L.P.S. This is a system that
everyone can make at a very modest cost. I have been ask this question several times this past year,
and just recently by a friend. First I believe that roof air conditioning should be
done installed, if at all possible, when you have the coach gutted. Then you can do a
proper job of welding in extra bracing to support the back bone of the coach. But some
times it is necessary to do it after it has been converted. The best way is to pick a
location between two ribs, try to get in the center as much as possible. Then with a
grinder cut the tops of the rivets from the back bone and the two vertical roof supports
that run on each side of the back bone. And the ribs on each side of your 14 inch hole.
Now cut a piece of 16 or 18 gage Stainless steel to fit this opening covering the two
ribs, and down just below the vertical supports below the back bone. This piece of S.S.
should be caulked all the way around and riveted down with S. S. rivets every 2 inches as
they are much stronger than aluminum. this will be much stronger than not putting anything
and letting the aluminum skin take all the stress. The reason to use S.S. is there is less
chance of electrolyses. Galvanized may work but if water gets between in any way you will
have electrolyses eat up the aluminum. To take the rear wheels off. When
nothing I have will break one , I use a old car bumper jack. You can move it up and down
to fit all lugs. Then I put a 8 ft. pipe on the wrench and all 205 lbs. of me on it . If
it wont turn it will break the bolt off. All buses use an electric temperature and oil pressure gages.
These gages use resistance to read so the longer the wire the more resistance. They read
close but not real accurate. Sometimes as much as 10 degrees off. After you have your
coach road ready, install a gage in the rear compartment that uses a catheter tube.
Install it in the block and see how much difference there is between them it and the one
on your dash. Cathter tube gages are more accurate than electric ones. You can come closer
to the actual temp your coach is operating at. This is also why on MCIs have a manual gage
from the engine on the left side off the coach just above the muffler. |
|
Information Systems Management.
|